Sand cast jewellery making was first used by the Pueblo society in the mid-seventeenth century. Its popularity tremendously increased because sand casting forms some of the most precious jewellery pieces in the world such as engagement rings. Recently, centrifugal casting has replaced sand casting largely, but for several years, sand casting was the most sought casting technique. Nonetheless, it still plays a key role in the manufacture of huge metal forms, and it offers benefits such as fast results, cost-effectiveness, and simplicity of duplication for skilled and experienced goldsmiths. If used properly, sand casting yields perfect results such as a true to detail engagement ring. This article will inform you all you need to know about this jewellery making technique.
Mould Bottle or Mould Frames
In the current market, there is a wide variety of mould frames. However, the most popular frames that are ideal for small-scale tasks are made out of aluminium or steel and they have a pair of similar rectangular frames. These rectangular frames don’t have a top or a bottom. There is an opening cut in each one of the narrow sides that is enlarged with a range that leads to a funnel when both of the frames are put together.
The difference between both of these parts is that there is the first unit, referred to as the cope, that has several registration pins projecting from it. The other half, referred to as the drag, contains tabs that are designed to receive those registration pins. As a result, they hold together the frame and line the sections up perfectly.
Sand Preparation
In the preparation of sand, moulding sand is passed through a sieve into a bowl then moistened slowly using water. Consequently, it is aggressively kneaded to ensure that the moisture is evenly distributed. The sand is then worked until it becomes pliable and can be shaped easily. The consistency is measured by squeezing a lump in your hand. If it retains its shape, then the consistency is correct. More so, it retains its shape even when tossed in the air and caught.
Mould Preparation
The drag is put on a plate glass in the frame’s lower third and both the frame and the model are dusted using parting powder. This is traditionally a fine-grained, yellowish powder that is extracted from Lycopodiaceen plants. Suitable alternatives include corn starch or talcum. A tablespoon of the powder is put in the centre of cotton fabric or linen, and its corners are pulled and bound using a cord. The objective is to create a bulb that will shed fine dust when tapped against an object or shaken.
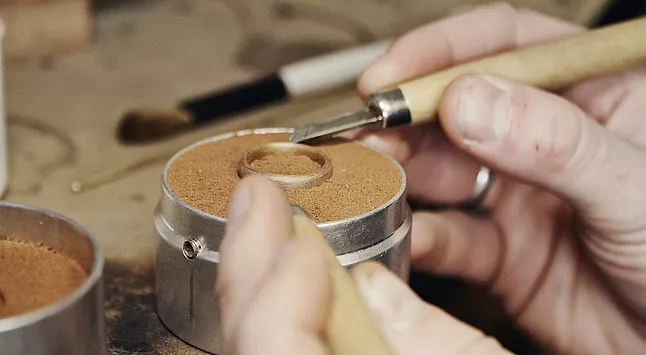
The resulting sand is then sprinkled on top of the model and the frame until it becomes roughly one centimetre thick. Next, it is pressed with fingers, beginning gently but increasing gradually until it becomes compacted under appropriate pressure. The extent that the sand will be pressed against the model will determine the detail that will be attained in the casting process. The more the pressure, the better the results.
Consequently, the frame is filled with more sand until it overflows, which is also pressed into position. Here, you also begin gently and gradually increase the pressure until it becomes packed with high pressure. Using a block of wood as your ram, pound the prepared sand against the model as you add sand as required to ensure that your mould is filled to the brim. The ramming necessitates the need for the model to be made out of sturdy material. The top of its surface is levelled in a process known as striking off by running along the mould’s top with a steel bar or a piece of wood.
The second block of wood, Plexiglass, or glass is put on the top of the mould frame and held in position when the entire unit is being flipped over. The top block of glass (one that was on the bottom originally) is then removed and the other mould frame is carefully lowered in position while aligning the registration pins to ensure a precise fit. The exposed sand surface is dusted using a parting compound. Just like before, the sand will be sprinkled on the frame and packed. Similarly, start gently and increase the pressure gradually with a ramming stroke from the piece of wood. Adequate sand is then added until the mould is filled, then struck off to create a smooth surface.
Then, both halves of the mould are divided by lifting off gently the top half. The model is pulled down from the sand using tweezers, ensuring that sand is not disturbed as much as possible. A sprue or a casting gate is then cut into the two halves of sand. Using a needle or a blade to scoop all the sand out, begin at the model region and progress to the open section of the wall of the mould. The benefit of beginning at the model is that the likelihood of spilling sand on the model cavity is minimal. Flat boards are usually placed on both sides of the mould to hold your sand in place. You should clamp them but no so tightly that the sand will collapse.
Casting Preparation
This is the last step of the sand casting process. the mould is dried slowly by heating it indirectly, in a similar manner as an oven. The reason behind this is that if the drying goes fast, the mould will crack. To assess whether all the moisture in the mould has been eliminated, hold a mirror near the pouring gate. A tell-tale mist will indicate the presence of moisture which means that the mould is not ready for casting.